Published on 9/4/2019
In terms of the domain, I want to draw the line here and not delve into the implementations of IBlogSyndication yet. Those implementations will be dealing with the actual social media APIs. Next I want to start looking at UI.
Blazor
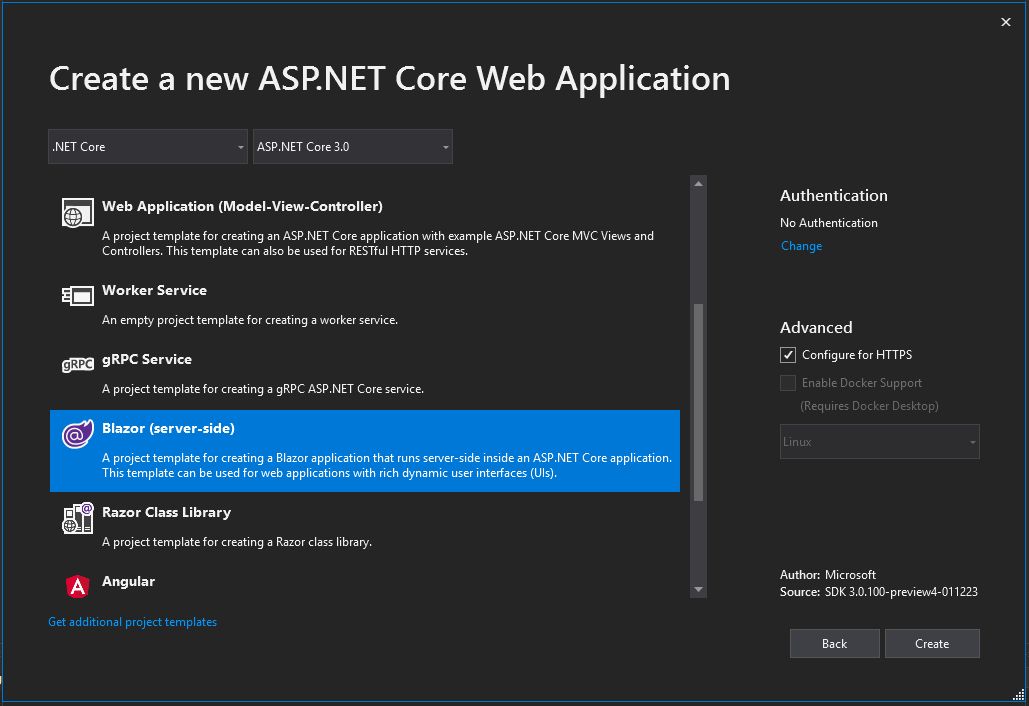
.NET Core 3.0 is currently still in preview, and a lot of noise is being made about the new Blazor tech. This appears to be the next evolution in user interface for the web, and there are excellent stretch goals for 3.0 for client-side Blazor components as well. We’ll start by creating the correct project type from the new preview builds (Visual Studio 2019 and .NET Core 3.0 previews).
The templated website layout is not too dissimilar from my current site. It’s got the top bar, and also a sidebar. For now I’ll simply add a blog section to the sidebar and the blog page to load. I’ll basically be looking at and following sections that already exist.
Sidebar and Component
Looking at the different .razor files, I found the sidebar items in the file NavMenu.razor, so I added another list item there.
<li class="nav-item px-3">
    <NavLink class="nav-link" href="blogs">
        <span class="oi oi-book" aria-hidden="true"></span> Blog
    </NavLink>
</li>
The href item in the markup there is essentially a route. This route appears to have to match the @page definition at the top of some page. I made a new Blogs.razor page to match this.
@page "/blogs"

<h1>Blog</h1>

<ul>
    <li>Title 1</li>
    <li>Title 2</li>
    <li>Title 3</li>
</ul>
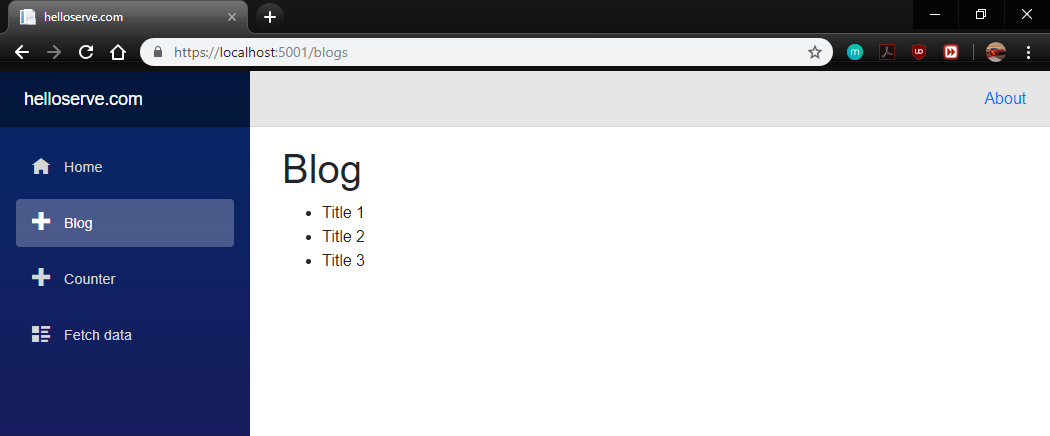
This is a simple page that simulates listing a set of existing blogs. Loading this up shows the following result.
NavLink and Routes
So that was easy enough. Let’s play around with the routes a bit. Perhaps we can mimic how the NavMenu.razor items work and link to separate blog pages from the index. It uses this NavLink element, so lets add that to the blogs index page.
@page "/blogs"

<h1>Blogs</h1>

<ul>
    <li>
        <NavLink class="nav-link" href="blogs/title-1">
            Title 1
        </NavLink>
    </li>
    <li>
        <NavLink class="nav-link" href="blogs/title-2">
            Title 2
        </NavLink>
    </li>
    <li>
        <NavLink class="nav-link" href="blogs/title-3">
            Title 3
        </NavLink>
    </li>
</ul>
I change the href properties to all reference individual titles. Then I add a single Blog.razor page that should map to these routes.
@page "/blogs/{title}"

<h1>Title</h1>

<p>Body</p>
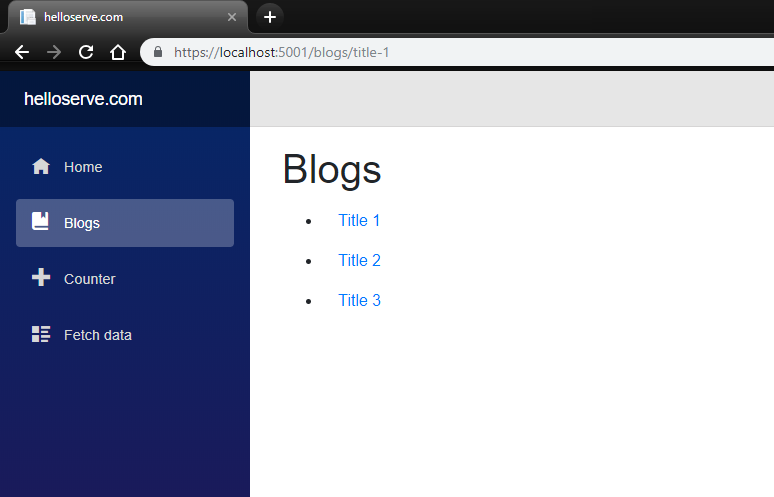
The index page renders correctly, but the links don’t do anything. It changes the URL in the address bar, but the page renders the same index page. This tells me that the routing doesn’t work, and probably the title part of the route here doesn’t work.
Reading a bit further, I derive that you have to declare a property for the page that matches the name of the route parameter. Sidenote: All properties (and methods) on the page or in components should always be private or protected.
@page "/blogs/{title}"

<h1>@Title</h1>

<p>Body</p>
@functions {
    [Parameter]
    private string Title { get; set; } = "fantastic";
}
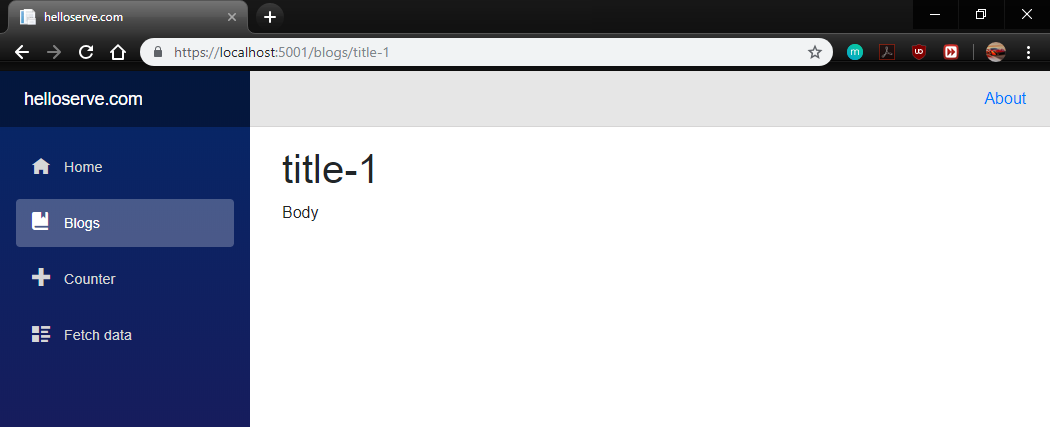
This results in the blog page loading correctly. It shows the title in the URL in the heading element.
Dependency Injection
The next step would be to go and load an actual blog entry. The templated solution includes a sample of this also. It has a “Fetch Data” menu option which loads some weather data. This is a very interesting example. The template has an @inject element that references a WeatherForecastService class. In the @functions section then, this service is invoked through it’s GetForecastAsync method. Additionally, the @inject element is a very strong hint that this server-side Blazor tech relies on dependency injection to resolve this reference to WeatherForecastService. Looking at the Startup class, this is confirmed by the registration of a singleton item of that time.
services.AddSingleton<WeatherForecastService>();
That concludes my very first look at Blazor and how it works on the surface. Now, how do we drive the user interface content?
Presentation Architecture
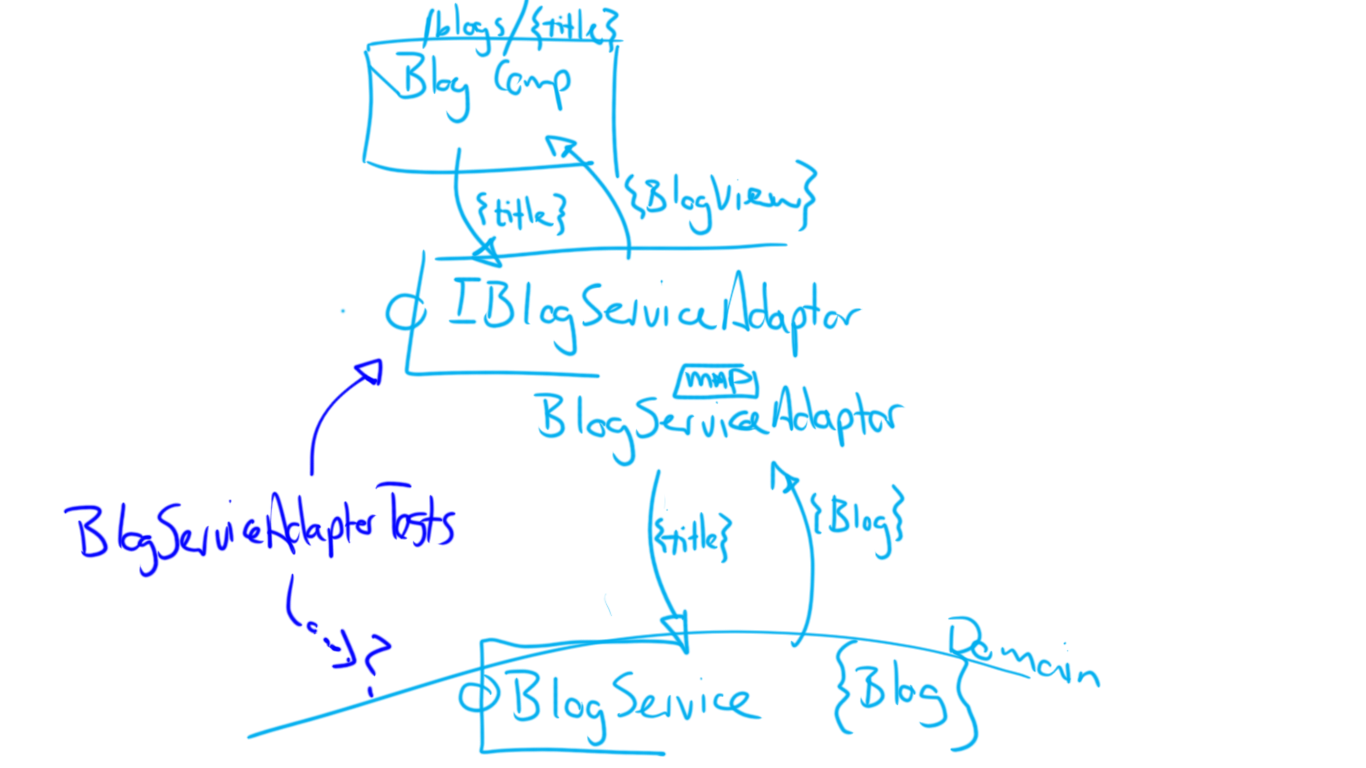
We already have a BlogService class, so we simply need to inject it to our blog page. But we have to be careful here. This templated solution serves as a very basic baseline, and is implemented in a simplistic way to make it easy to understand. For example, because they reference the WeatherForecastService class directly in the Fetch Data page, the page is now strongly coupled to that service. Ideally you want to break that dependency (by inverting it) so that your presentation elements (the pages and components) in the presentation layer is not directly dependent on the underlying services in the domain layer. Again, we want to put down a set of abstractions and adaptors that are responsible for integrating with the domain layer and taking the domain models and transforms them into the view models that the components understand. Let’s draw a diagram about that.
SOLID: D for Dependency Inversion
Here you can see that the component passes title to the adaptor abstraction. The page doesn’t know where the data comes from, it only knows that it gets back a BlogView item. This view model and the IBlogServiceAdaptor abstraction is defined within this presentation layer. In this way we’ve inverted the dependency, and relegate any strong coupling to the domain layer to the adaptor on the edge of this layer. This is implemented by BlogServiceAdaptor of course, and it knows about the domain’s BlogService and Blog class. But it also knows about BlogView, as its job is to map from Blog to BlogView.
Additionally, this architecture allows us to test the adaptor in isolation. This is important because at this point I’m not sure how you would be able to setup the page in a unit test and execute it directly. This might not even be possible (it looks like it is possible with components however, if you provide a code-behind file). So you want to keep the amount of code in the page’s @functions section to an absolute minimum, and rather do the bulk of the work in the adaptor that you can test. But something else has now emerged. The adaptor understands about the BlogService class, but in the unit test implementations I won’t be able to mock out BlogService directly. We will need something extra here to replace that question mark in this diagram. Can you guess what it is yet?
Quick Iterations
I’m not a designer at all. In fact, I’m terrible at it (as you will soon see). But I do know that designing a web page requires a lot of iterations and hot reloading. There is only one way to test your work, and that is to get it running and loading in the browser as quickly as possible. The more of your stack that you have wired up, the slower this is to do. In fact, you ideally don’t want anything below your presentation layer rebuilding, loading, allocating and registering when you just want to iterate over small changes in CSS or HTML.
SOLID: L for Liskov Substitution
In order to iterate quickly on a sustainable basis throughout the lifetime of the project, you want to substitute your actual adaptor implementation for something that mocks data for testing purposes that is quick and on demand. It is impossible to do this without inverting the dependency to the domain layer and the services. There are a few mechanisms to leverage here, like feature toggling via config for example. Another way is to leverage compiler directives. Let’s consider the latter option for now.
Debug vs UITest
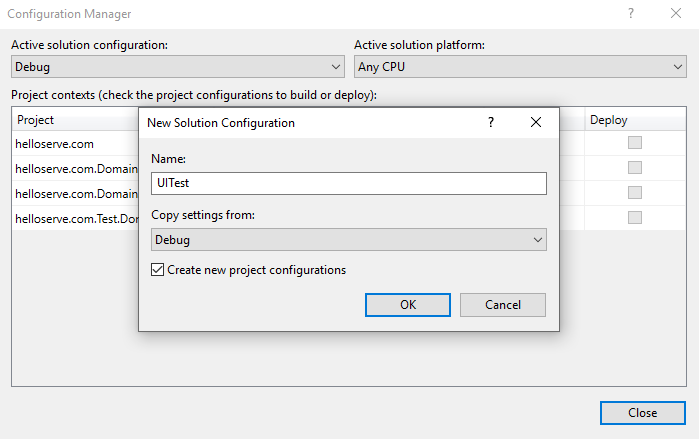
In Visual Studio you have the ability to switch it to different “modes”, and you can configure these modes too. These “modes” are referred to as configurations. By default there are two configurations: Debug and Release. And in your code it is possible to switch sections out of it based on the selected configuration setting.
#if DEBUG
	//do something
#else
	//do something else (for release mode)
#endif
Or
#if RELEASE
	//do something
#endif
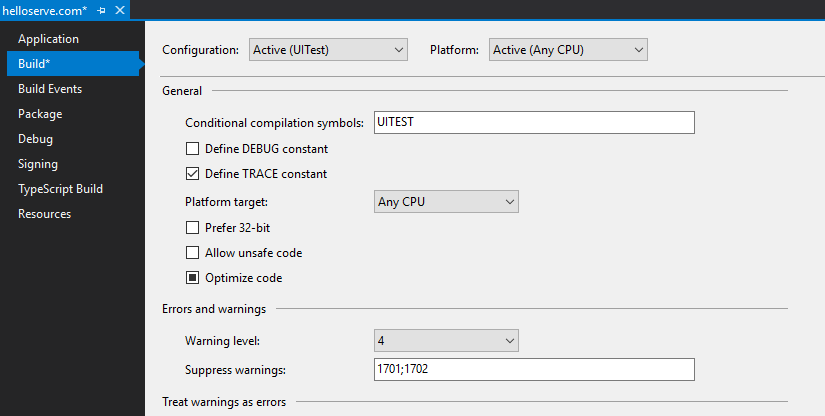
Debug is the name of the configuration, and each configuration can be specifically setup to declare one or more conditional compilation symbols per project. These are typically upper case, e.g. DEBUG.
This allows you to do something different when the code has been compiled for a development environment from for when it is compiled for a release environment. Debug is typically only used by you within Visual Studio. We can add another, lets call it UITest.
Then we go to the project that we want to affect, select properties and on the Build tab we can declare our symbol.
Now let’s declare the IBlogServiceAdaptor and start mocking.
public interface IBlogServiceAdaptor
{
    Task<BlogView> GetBlog(string title);
}
And we need to define the BlogView model too.
public class BlogView
{
    public string Title { get; set; }
}
We’re ready to start building a mock using this interface.
public class MockBlogServiceAdaptor : IBlogServiceAdaptor
{
    public Task<BlogView> GetBlog(string title)
    {
        throw new NotImplementedException();
    }
}
And we need to register this so that our page can get access to it.
public void ConfigureServices(IServiceCollection services)
{
    services.AddRazorPages();
    services.AddServerSideBlazor();
    services.AddSingleton<WeatherForecastService>();
#if UITEST
    services.AddSingleton<IBlogServiceAdaptor, MockBlogServiceAdaptor>();
#endif
}
Notice how that line of code will show completely grey when you switch back to Debug or Release configuration. It will not even compile that code in one of those two modes. So now that we have all that in place, we can start using it in our Blog page.
@page "/blogs/{title}"
@using helloserve.com.Adaptors
@using helloserve.com.Models
@inject IBlogServiceAdaptor  ServiceAdaptor

<h1>@Model.Title</h1>

<p>Body</p>
@functions {
    [Parameter]
    private string Title { get; set; } = "fantastic";

    BlogView Model;

    protected override async Task OnInitAsync()
    {
        Model = await ServiceAdaptor.GetBlog(Title);
    }
}
When we run this, we don’t see the blog page load correctly, and in the Output pane we see the following.
System.NotImplementedException: The method or operation is not implemented.
   at helloserve.com.Adaptors.MockBlogServiceAdaptor.GetBlog(String title) in E:\Projects\helloserve.com\src\helloserve.com\Adaptors\BlogServiceAdaptor.cs:line 11
   at helloserve.com.Pages.Blog.OnInitAsync() in E:\Projects\helloserve.com\src\helloserve.com\Pages\Blog.razor:line 18
   at Microsoft.AspNetCore.Components.ComponentBase.RunInitAndSetParametersAsync()
Exception thrown: 'System.NullReferenceException' in helloserve.com.dll
Microsoft.AspNetCore.Components.Browser.Rendering.RemoteRenderer: Warning: Unhandled exception rendering component: Object reference not set to an instance of an object.

System.NullReferenceException: Object reference not set to an instance of an object.
   at helloserve.com.Pages.Blog.BuildRenderTree(RenderTreeBuilder builder)
   at Microsoft.AspNetCore.Components.ComponentBase.<.ctor>b__5_0(RenderTreeBuilder builder)
   at Microsoft.AspNetCore.Components.Rendering.ComponentState.RenderIntoBatch(RenderBatchBuilder batchBuilder, RenderFragment renderFragment)
   at Microsoft.AspNetCore.Components.Rendering.Renderer.RenderInExistingBatch(RenderQueueEntry renderQueueEntry)
   at Microsoft.AspNetCore.Components.Rendering.Renderer.ProcessRenderQueue()
Microsoft.AspNetCore.Components.Server.ComponentHub: Warning: Unhandled Server-Side exception
We expect the NotImplementedException, because our mock service adaptor throws this. And then we also see the NullReferenceException, which is probably due to the page referencing the Title property of a null model.
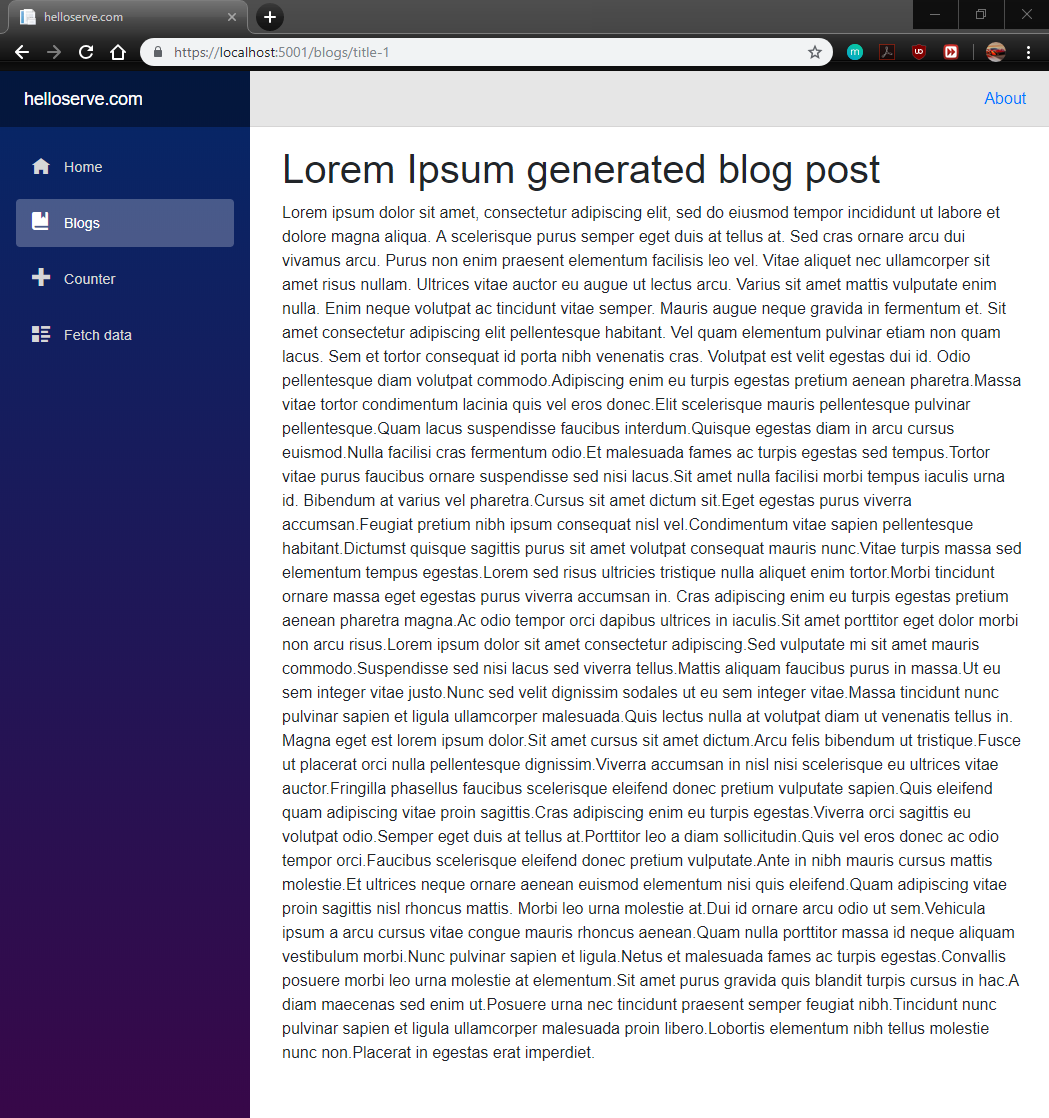
It is interesting that Blazor doesn’t redirect to the developer exception page. Hopefully this will be fixed in a later update before it is out of preview. This is just another reason why we want the ability to test our web front-end using mocks and iterate quickly over these issues we encounter. Let’s complete our mock so that we can get some actual nice content into the page.
public async Task<BlogView> GetBlog(string title)
{
    return await Task.FromResult(new BlogView()
    {
        Title = "Lorem Ipsum generated blog post",
        Content = "Lorem ipsum dolor sit amet, consectetur ..."
    });
}
I added the Content property, and also referenced that in the Blog page. Now we see this.
Formatting
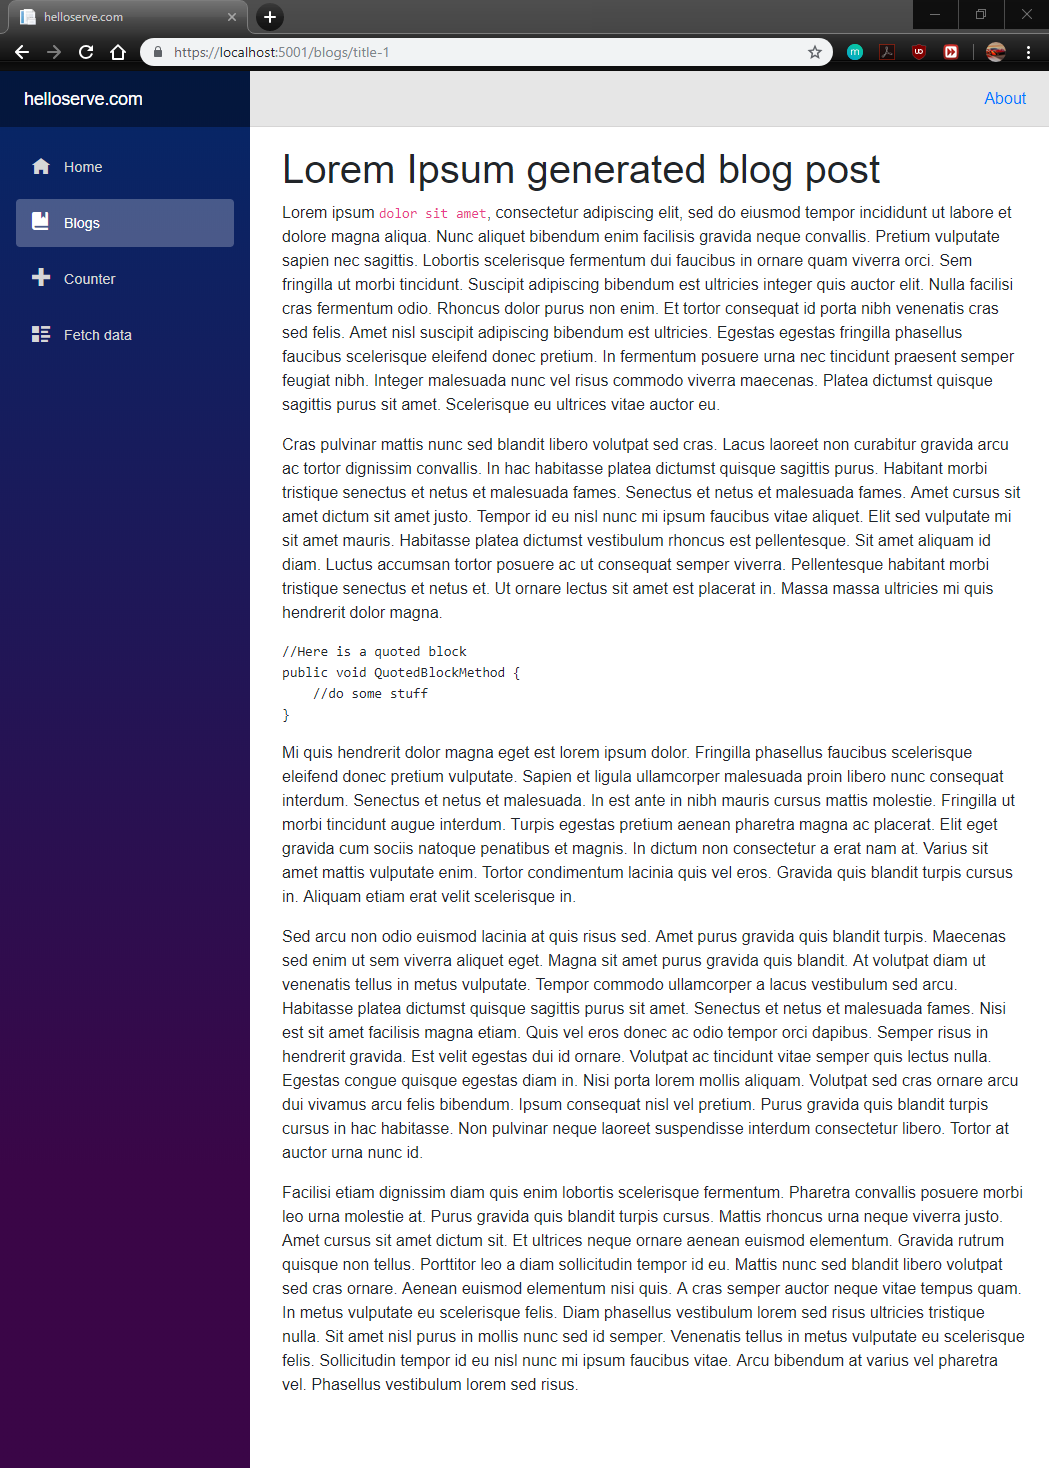
While this is cool, it definitely needs a lot of work. One of the first things we need to do is get the formatting of the blog proper, like using paragraphs for instance. But of course I also need items like formatted code, and I need quoted blocks for instance. The easiest way to achieve this for me as an author is to use markdown. This is very popular and simple to grasp and type out in a text editor. But markdown doesn’t necessarily translate to HTML very well without some conversion. This conversion is part of the presentation issue, and it would be the primary purpose of our real BlogServiceAdaptor implementation. So while the Blog domain model would contain the raw markdown, the BlogView web model should contain the raw HTML that can be dumped straight into the Blog page. Because we’re dealing with our mock for now, let’s change it to contain HTML instead since it produces an instance of BlogView.
In order to use the HTML directly, we need the equivalent of Html.Raw that MVC had. Fortunately, someone already asked this question. So I make that small change to the Blog page, and now we have this.
Conclusion
In this part we started thinking about our presentation concerns, and looked at Blazor. This is a brand new technology from Microsoft and the ASP.NET Core team that looks set for widespread adoption. At this point this is Blazor for server-side only (and I’m only using pages), and there is also Blazor for client-side coming which we will hopefully start looking at too, soon. We saw how we still have to apply our SOLID principles in order to facilitate quick iterations over small changes to the pages, and how we can isolate supporting mocking code using compiler directives. It is important to know and understand your tools well so that you can leverage off of their abilities. Notice however that here I’m not referring to "productivity" tools like Resharper, instead I refer to the C# and .NET solution and project build options and how that helps us design our software better and quicker. We also saw how we kept details like markdown vs HTML out of our minds (and out of our domain layer) until we started dealing with the presentation layer of our application.
